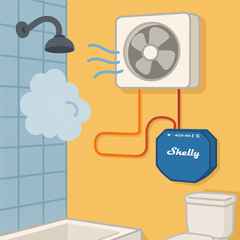
I live in a fairly new home, and like most modern houses, it came with a mechanical ventilation system. In my case, it’s a baseline Buva Q-Stream unit. The issue? It only comes with a wired control panel located in the kitchen.
Now, that’s not exactly where I need it most. What I really want is for the system to kick in automatically when someone is taking a shower, so the bathroom doesn’t turn into a steam room and soak the walls. That is what we’re going to fix today and without breaking the bank.
Disclaimer:
Some of the product links in this article are affiliate links. I added them afterward to items that are necessary or recommended. Using these links helps support my work on articles like this one, thank you if you choose to use them! If not, no worries at all. 😊
Pre-requisites
- A running Home Assistant instance
- Shelly Dimmer 0/1-10V PM Gen3
- Some 230V wires to connect it all
- And a 0-10v control option on your mechanical ventilation unit
- A humidity sensor like this one I used. Beware the one linked is Zigbee, for which you’ll need a Zigbee network.
The Quest for a Remote
My first idea was to look for a compatible wireless remote that I could stick on the bathroom wall.
Turns out… those are unreasonably expensive — we’re talking €100+, and even then, you’d still have to press a button manually every time you shower. Not ideal.
What are the options
Naturally, I opened up the control panel and dug into the manual.
And there it was: a DIP switch setting that allows the unit to be controlled via 0-10V voltage control. Bingo! Looking at the manual its also described there:
- Number 4 being the DIP switches
- Number 5 being the 0-10V connectors
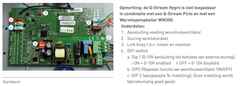
You’ll need to verify if you have a similar option on your ventilation unit.
Supplying 0-10V
Now the question became: how do I supply a 0-10V signal?
In my previous blog post, I used ESPHome to solve a similar problem, so that was my first thought here as well. But in this case, generating a clean analog voltage output using ESPHome is a bit tricky. Not impossible though, this blog article from Casper describes how you can do this. But I’d rather have something simple.
After a bit of Googling, I discovered that some smart LED dimmers use the same 0-10V voltage range. That sounds promising.
First Attempt: Shelly Plus 0-10V Dimmer (Did not work)
Excited, I ordered a Shelly Plus 0-10V dimmer. But unfortunately, it didn’t work.
Why not? Turns out this type of dimmer is “sinking”, meaning it doesn’t output voltage unless the input is already powered. The ventilation unit expects a “sourcing” signal instead. So I returned that unit and went back to googling.
Second Attempt: Shelly Dimmer 0/1-10V PM Gen3
Luckily, Shelly recently offers a sourcing-type dimmer: the Shelly Dimmer 0/1-10V PM Gen3.
I ordered that one, wired it up… and whola! It works 🎉
Now I can control the ventilation system directly from the Shelly app, and automate it with other smart home triggers.
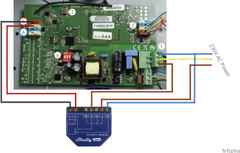
Wiring Diagram
Check out the diagram below to see how I connected the dimmer to the ventilation unit. It’s fairly straight forward and should work with most 0-10V controlled systems.
This is how it looks in my ventilation box.
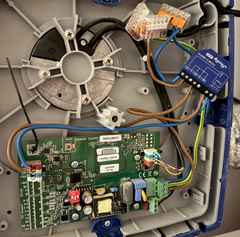
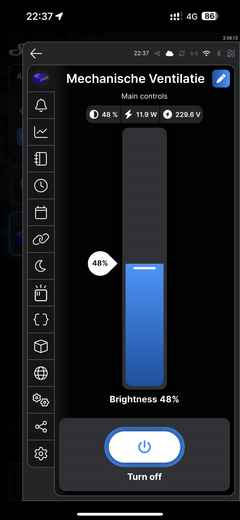
After connecting it to the Wi-Fi through the Shelly app you can already control it in there.
Here is a screenshot, and as a bonus you also get the current wattage and voltage.
Now to Home Assistant
First off go to integrations and add the Shelly unit to your home assistant, it should auto discover it.
Once it is available in Home Assistant we need to use it in an automation, I chose to use this automation from Blacky. \Follow the steps on that page on how to setup the derivative humidity sensor.
2 Tips for setting up this automation with the Shelly:
- I made an shower boolean setting: settings>helpers> new input boolean
Used that sensor as the fan entity in the automation - And then use the lights section to link to the actual Shelly.
You can use the brightness to control the speed.